Posted on
June 14, 2018 by
Admin under
Modeling, Photo Sessions, Photography

 Catchlights are the lights reflected in a subject’s eyes. I normally use strobes to capture them. Catchlights add life and sparkle, while their absence can result in dull, lifeless images. There are no hard and fast rules, and sometimes you may want dead and lifeless. It’s all about knowing what you want, why you want it and how to create it. But portraits are almost always better with catchlights.
Single vs. multiple catchlights
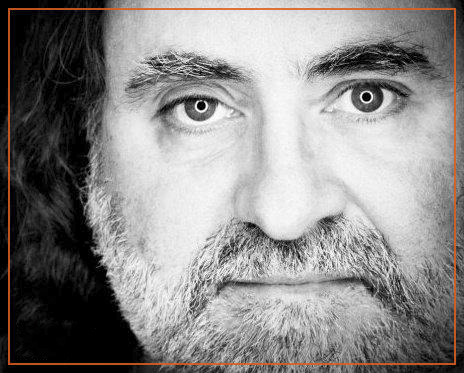
Regardless of the light source used, the goal remains the same: replicating what exists in nature. In nature, we have only one light source, the sun, and there’s only one. I’m not a fan a multiple catchlights. There are exceptions to this, notably in the studio with certain fashion, cosmetics and beauty lighting applications, so we’ll look at them both ways. While studio lighting is a bit more forgiving in the catchlight department, my preference is still a single catchlight created by an overhead keylight. A single catchlight is more natural looking. Multiple bright lights reflecting in a subject’s eyes screams artificial lighting.
Positioning your catchlights
Catchlights are best positioned in your subject’s eyes at either 10 or 2 o’clock, just like the ideal hand positions on a steering wheel. Use 10 and 2 as your catchlight position guideline. There’s one more position, the one you never learned in driving school but use every day: the 12 o’clock position. You want your catchlights creating crescent shapes at the tops of the eyes. So 10, 2 or 12 are the ideal positions for catchlight reflections in a subject’s eyes. As long as you stick with those three positions, you’ll be on solid ground.
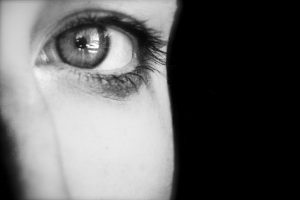 Rarely do you want a catchlight in the lower portion of the eyes, under the retina. This occurs when a light source is placed below the subject’s eye line. We’re attempting to replicate what happens in nature, with light always coming from above. Lighting a subject from below creates a ghoulish effect
 , but there are exceptions to every rule. When you add a second light above that acts as a dominant keylight, you get a pleasing over-and-under effect known as clamshell lighting. I cover other lighting patterns and their catchlights below. In any lighting pattern, any secondary catchlight should be subtle and subordinate to the power and appearance of the keylight.
The position of the catchlight reflected in your subject’s eyes is a direct result of the height, angle and position of the keylight in relationship to the subject. The 10, 2 and 12 catchlight positions are created using these classic lighting patterns: Paramount/clamshell light (12 o’clock) and Rembrandt/loop light (10 and 2 o’clock). If you want a catchlight at the 2 o’clock position in your subject’s eyes, move your light to the same position left or right around the circumference of your subject. The same is true for the 12 o’clock position of the catchlight created with Paramount and clamshell light—simply position your light source above your camera positioned directly in front of your subject. To control where the catchlight falls height-wise, raise and lower your keylight until the catchlight is where you want it. For me, that’s a crescent shape at the top of the eyes.
Filling in the shadows
To fill in the shadows on the side of the face opposite the keylight, you’ll need a reflector, which provides subtle fill without distracting secondary catchlights. Reflectors are incredibly flexible despite the fact that they don’t have their own power source or light modifiers. With reflectors, you use distance to control the amount of light they contribute. The closer a reflector is to the subject and keylight, the brighter the fill light. Conversely, the farther away the reflector is from the subject, the less light it contributes. You also have a range of fabrics to choose from that reflect light with different efficiency, intensity and contrast. The basic rule of thumb is white fabric for a softer, more subtle effect and silver when you need more light and contrast.
The ideal catchlight shape is a matter of personal taste and is dictated by the shape of light modifier on your keylight. There are a few modifiers that are perennial favorites based on the more natural-looking catchlight shape they create. Octabanks were invented for this very reason. Their octagonal shape creates a natural-looking reflection in contrast to that of square or rectangular softboxes. The beauty dish is another modifier favored for the circular catchlight it creates. Umbrellas are another option; they don’t provide a lot of control in the way of light spill, but they are a large round ball of light not unlike the sun. Square and rectangular softboxes can be used, but the reflections in your subject’s eyes will mirror those shapes. It’s all about individual preference.
Ring lights
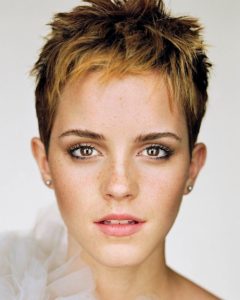
 Ring flash and ring lights are niche lighting tools that are in a category all their own. These lights create a signature doughnut-shaped catchlight dead center in a subject’s eyes. Stylistically, there isn’t much middle ground with ring flash and ring lights; people either love or hate the catchlights they create. I love them.
Catchlights are also useful when you’re trying to decode how an image was lit. They provide telltale clues about the lighting tools and techniques used. You can make educated guesses about what kinds of lights were used, how many were used, how they were modified, what their positions were and how far they were placed from the subject. So when you’re trying to reverse-engineer lighting you see in a magazine or on a movie poster, look to the catchlights.
Posted on
June 12, 2018 by
Admin under
Business, Motivation, Photography
 I have worked my ass off building a successful business. But it hasn’t been easy. The last two years have been enough to break the strongest-willed person.
So, what do you do? I am sure as you read this you can relate on some level. You have had things go wrong in your life or business. We all have. I don’t have all the answers. All I can do is share with you my lessons learned and how I have managed turmoil, adversity and negativity in my recent past.
Roll with the punches.
One thing I have come to realize is that you just have to roll with it. I don’t know, maybe it’s just experience that has led me to this conclusion, but what are you going to do? Give up? Whatever you are doing in life or business, it is going to be met with some level of friction. It’s impossible for it not to. I stress this to myself and my team constantly: “If it were easy, everyone would do it.”
That’s not just some cliché line. Think about it. The people who are successful are there not because they are the best or the smartest. Many times it’s because of their sheer will to do things that others are unwilling to do.
All too often, I see entrepreneurs struggle when they hit pain or friction. The first “no” they hit, they just sort of panic and give up. You just need to tell yourself, “I got this” and roll with it.
Don’t let the negativity get you off your game. And by the way, that negativity can come from friends and family, not just “haters.” Once you start climbing your success ladder, people will become very negative and very few will truly be happy for your success. I have found that circle in life to be very small.
It’s not me, it’s you.
When adversity strikes, you have a choice to make: cower in the corner with fear and panic or strike back. My philosophy has always been: I didn’t start this, but I sure as hell am going to finish it.
We are all entrepreneurs. The challenges I am speaking of impact you whether you are building a business or a career. The corporate world is cutthroat. I know, I spent 40-plus years in it. Climbing that corporate ladder? Rest assured, there is someone trying to chop your legs out from under you. You have either felt it or experienced it. If not, then I promise you, you are not the rising star in your circle.
I believe in success for all. I don’t believe your success comes at my failure or vice versa. Not everyone feels that way. Is it jealousy? Or is it pure laziness? I believe it’s laziness. You may want success but are too damn lazy to go out there and work your ass off to get it. Many of us make excuses to make ourselves feel better. “Oh well, he got the promotion because he is a kiss-ass. I am more qualified”—I guess that’s one way of looking at it. Or, “He got the promotion because he spent more time selling himself, making sure the people in the office knew how qualified he was, and spent time networking with the key people in the office.” See my point?
Is photography really any different? I had to laugh when I was reading in a local Nottinghamshire photography forum about a photographer who was a guest at an event I was shooting. He was mocking me and my business because we were supposed to be a high-end studio, but I was wearing Chino’s at the event. How unprofessional of me. Really? That’s all you got? You are sitting home broke, your business is failing or struggling, and your thing is I am wearing Chino’s. So you are better than me because of that?
We all know what it is like to deal with the cattiness of our peers. Do not let it break your spirit. Instead, realize that this comes from a place of negativity and a refusal to accept that they are where they are in life and business because of the decisions they make. It’s not you. I promise you. It’s them.
Keep that in the back of your mind. These people are pathetic, they are jealous, they are a cancer in your life. Disconnect from them. Disconnect from these groups. Focus on what you are doing because you are doing something right.
Deal with the hand in front of you.
I have learned in both business and in life that I can’t always control what lands on my doorstep, but I can sure as hell handle how I respond. I believe in fighting fire with fire. You come at me, I am bringing the heat back at you. I will never run from a fight. I am just not wired that way. Now, that might lead you to think I like conflict or adversity.
Actually, nothing could be further from the truth. I would much rather have peace around me. You can’t control what the people around you do. I have learned that over and over again. But you can control your own destiny. You will be dealt a hand and then have a choice to make. Fold and run or stay and play it out.
If you decide to fold and run, you are not meant to run a business and you will struggle your entire life to find success at any level. Harsh? Perhaps. Reality? Most definitely.
Success is not easy. It’s hard. It’s messy. It’s a struggle to get there and even harder to stay there. You need to learn how to fight for what you want when it gets tough. Most importantly, you need to learn when to bring some offense to the fight so you’re not always playing defense. An attack will come fast and furious at times, and you will need to take what you have been dealt and make the most of it.
Fight the fight, and, most importantly, fight to win. Let everyone around you know that you are in this to win and that if they come at you, you will push back on them even harder.
Shit happens—keep pushing forward.
On your journey through your career, you will be faced with adversity on many levels. Do not let these moments break you. It’s hard, I know. But it gets easier with every passing day. You are not alone. Everyone’s dealing with their own demons. It can feel like the weight of the world is on your shoulders at times, but you can do it. You can push through this. Just stay positive and surround yourself with positive people who want the same things. You will soon realize that your circle should remain tight. Keep the cancer out.
Remember: If it were easy, everyone would do it. It’s true. People are lazy. They want the fruits of success without the incredibly hard work that is required to get there. If you are one of those people who gets this and understands that success is not about luck but about working longer and harder than your peers and doing the things that no one wants to do, I am speaking to you.
Success is there for you. Work hard, and when you feel like quitting, push even harder. Pull an all-nighter. Do what you need to do to achieve your goals. When those around you are laughing at you, mocking you, telling you it can’t be done, use that as fuel. Prove them wrong. Be motivated to show them you will succeed. The ways you handle the pressure will become your defining moments. I believe in you.
And by the way, I am wearing Chino’s as I write this.
Posted on
May 16, 2018 by
Admin under
Modeling, Photo Sessions, Photography
 Inspiration
The most exciting kinds of artificial lighting are those that mimic natural light. It’s not easy to recreate nature’s subtle, atmospheric qualities. Beginners make the common mistake of throwing way too much light at what they’re shooting. Whether you’re shooting people or products, less is more. The more focused the lighting, the more interesting and visually compelling it becomes. If there’s light everywhere, there’s no direction for the viewer’s eye to follow. If there’s a scarcity of light, the areas that are illuminated become the focal point. We see this kind of subtle light in nature.
Lighting geeks like me love nothing more than watching the way sunlight behaves as it streams through a narrow opening, moves across the sky or scatters into beams of light as it breaks through clouds or strikes the leaves of a tree overhead. It results in unique shapes and patterns. These magic lighting moments give me pause and remind me how powerful light and shadow can be in creating mood and atmosphere.
In photography, we recreate these effects using tools known as “go-betweens,” aka “gobos.” These are typically a piece of wood or metal with a series of shapes and/or patterns cut into it. A gobo goes between the light and the subject to cast a shape or pattern onto it. There are also constant lights and strobe modifiers with built-in mechanisms that allow shapes to be created with light and also permit the definition of those shapes to be varied as desired.
Concept
The concept for this “Slash of Light” shoot was the result of a collaboration between local model Laurel Mona and me. We connected via Facebook, where I always post new work, which is a great way to cultivate new relationships with creatives interested in collaborating. Laurel sent over a series of sample images of concepts she was interested in shooting. Several of the images reminded me of a concept I’d been wanting to shoot that was inspired by the striking patterns and shapes created every day on my walls by the afternoon sun streaming through my windows.
This warm, defined, dramatic light changes its shape and angle with each passing hour. We settled on this concept, and over the next few days, Laurel followed up with multiple wardrobe and accessory options. Nailing down many elements before the shoot helps assure everybody is on the same page and working toward the same creative goal.
Styling is a big part of the equation. Ideally, the colours of the background, wardrobe, and hair and makeup should work together to support the overall look and feel of the concept. We chose a warm-toned wardrobe and accessories to help accentuate her auburn hair, a mottled-gold background and the look of afternoon sunlight.
Lighting
One of the best tools for creating shapes with light is Profoto’s Pro Zoom Spot. With this focusable Fresnel and a strobe, you can create a beam of light that you can adjust from zoom to spot and soft to sharp.
Popular Fresnel models are available from Bowens, Elinchrom and several other manufacturers. What differentiates the Pro Zoom Spot from the crowd is its four built-in user-adjustable blades that can create an endless variety of shapes. When you combine this shape-making capability with the Fresnel’s ability to create anything from soft edges all the way to super-crisp shapes, things get really exciting. The Pro Zoom Spot acted as my key-light and is responsible for the slash of light you’re seeing in these images.
The new model, with its built-in 4,800-watt-second strobe, wouldn’t make sense for me at its prohibitive price tag of £8,000. But the legacy model I use, to which you add your own Profoto Pro Head, can be found on eBay for around £300.
I have seen people get close to this effect using a speed-light. In this method, a cardboard tube is attached to the speed-light. At the front of the tube, two strips of gaff tape are used to create a rectangular shape with the light when the flash is fired. Lastolite makes a set of gobos with which you can create shapes and patterns with speed-lights. You won’t achieve the same degree of crispness on the edges of the shape, but they offer a cool, inexpensive way to get close.
The shape created by the Pro Zoom Spot was confined and hard-edged, with no falloff to illuminate Laurel’s body or the background. This resulted in a flat look that lacked separation, layering, and dimension. So I added two fill lights, one at a time, to better judge their contribution.
These additions needed to be extremely low-key or I’d risk destroying the subtle effect created by the key-light. I needed a kiss of light on the backdrop to create separation and bring in its gold tones, and an equally low level of light on Laurel’s body to provide detail and avoid everything falling into black.
To illuminate the background, I used a Profoto B1 500-watt-second strobe with a 20-degree grid spot. This created a subtle circle of light on the background, providing the separation needed to create more depth in the images.
To add detail to Laurel’s body, I added a second Profoto B1 500-watt-second strobe modified with an Elinchrom 14 x 35 strip box. I varied the strip box’s height and horizontal and vertical orientation for ground and standing poses and positioned the fill lights. For the tighter portraits, I used the gridded strobe camera left as a hair light and angled the strip box slightly toward the backdrop to maintain separation.
Retouching
Word to the wise: This is not a forgiving style of lighting like clamshell, which we might use when shooting beauty and portrait work. This light has much harder qualities that accentuate every line and blemish. Expect retouching to be more laborious and time-consuming, but the payoff is beautiful dramatic images. For retouching, I used my go-to Beauty Retouch Panel by Retouching Academy, an inexpensive Photoshop plugin that takes care of many of the repetitive tasks required in retouching.
Posted on
May 1, 2018 by
Admin under
Motivation, Photography
 Many photographers dream of working on location in incredible places where one might encounter the occasional giraffe or dolphin. A few years ago I was exposed to the dark side of destination shoots when I was invited by my good friend Brian to shoot inside a vast abandoned country house in West Yorkshire erected before the Civil War. Since then, I’ve had the urge to visit destinations where I am more likely to get tetanus than to see a family of elk.
There is a strange allure to working on location in these abandoned buildings. Part of it is the architecture and history of the building. But to be honest, I’m mostly into it for the spooky factor. At the house, my mind was free to ponder the 100s souls who died there. When I walk through the halls of places like this, I let my mind wander to the history. I also think about the architectural workmanship of those who are long dead and forgotten.
In the nursery room, the name of a nurse was carved into the concrete floor. That gave me an odd, ghastly feeling. Perhaps I was feeling what those gizmos adorned with a lot of blinking lights measure on those ghost hunter shows.
Most of the subjects I enjoy shooting fall into two distinct categories: those that complement the place and those that oppose it. Shooting high-fashion and artistic nudes contrast strangely with the destruction all around the subject, and that dichotomy is interesting to me. The other category embraces the nature of the place, and that is where I get into my arcane mood and work on somewhat disturbing images that evoke an emotion. I am not into gore or blood, but enjoy the more subtle ways of giving those little hairs on the back of the neck a workout. Creating spooky images and seeing the proper response is more natural than some other forms of art where pretentious people come up with all sorts of wild reasons you made an artistic choice. In this case, they just drop their glass of wine and freak out, and you know your mission is accomplished.
I embrace the feeling I get from a specific location. Most of the time, this isn’t going to be a happy one. We might as well call it creepy. As you can probably guess, I love creating images filled with emotion in places like these. Most of mine also include a figure, which might be wearing something that fits the theme, or a beautiful nude. Another common reason for risking entry into these abandoned locations is the sheer wealth of goodies for compositing. I have found unique textures and scenes that just don’t come along frequently, and capturing them adds a unique character to my images.
You’re probably wondering if I believe in ghosts. I don’t, but I have been in many places that should be on any respectable ghost’s list of places to haunt.
Now that you know the reasons I enjoy it, you are probably ready to grab your camera and find some busted house for your next photo session. Before you do that and end up in jail, or worse, let’s talk about some of the things you need to know before you venture forth. Keep in mind this isn’t an exhaustive list, and I am not an expert like some hardcore “urbex” photographers.
Don’t Go Into Basements
There are structural concerns in most of these places, and being on the bottom of the pile doesn’t give you the best odds of survival. Secondly, if there are ne’er-do-wells, wild animals, crazy spiders or exploding fungus, this is where they prefer to live. Bring a sword and a torch or two if you plan to venture down those stairs alone because I am not coming with you.
 The Opposite of the Basement Is the Roof
The roof is often the weakest part of the structure for load bearing. Walking on an old roof is a riskier dice roll than the band of stupid adventurers that went into the basement.
Don’t Go Into Houses
Houses are where people are likely to be living (duh). After the last legal residents have moved on, homeless people often take their place, and they don’t much care for visitors. Unless you are an aspiring crack dealer or have a death wish, just stay out of houses. They also have some of the weakest floors and decay much more quickly than their commercial counterparts.
One of the phrases I have heard uttered is “Breaking and entering is a felony, but trespassing is a misdemeanor.” Now, I am not condoning you enter places illegally, but keep in mind that you are probably breaking a law or two in most cases. Be especially careful at federal properties, like abandoned post offices—entering those places is a felony even if the front door is wide open or even missing.
City Permits and Safety
There are plenty of abandoned buildings you can enter for a small fee and enjoy a day of photography without fear of being hauled away in handcuffs or face a hefty fine. Contact a city’s film and television office and ask about an urban explorer pass or permit. They often have lists of locations and descriptions of the safety of those spots.
Just because you have permission doesn’t mean you are safe from those willing to do you harm and take your camera gear. Use common sense, be aware of your surroundings and don’t go alone.
Wear Proper Clothing
Many of these places are downright dangerous. Wear safety shoes to protect your feet from rusty nails, strategically hidden poo and other scary things you probably should kick before they bite you. Change your shoes after you leave the building. You don’t want to track whatever you stepped in all over anyone’s house or car.
Don’t Do Damage
Even if you are in a place that is filled with graffiti, you are there to explore and document, not to alter the location. Be a ghost. Don’t disturb anything. Every time you move something, you stir up dust that can contain a lot of things you probably don’t want to breathe into your lungs. Consider wearing a mask. Fungal spores, mold and lung-shredding particles of asbestos are often prevalent. Depending on your research of the location, any or all of these safety precautions are things you should consider. As I have said before, use common sense.
Many of the most exciting places are those off the beaten path. Most cities have buildings that might still have their original furnishings and equipment or be in pristine but an aged condition. These are goldmines that are closely guarded secrets among those who discover them. A little research can open a door (literally) that would not otherwise be available. Having a robust portfolio of work can also talk you into locations where they know you will respect their property. That portfolio can get you out of a situation with the law when they can see your work and know you are not the type of person they would want to arrest. Of course, all of this goes out the window if you happen to be in a place where the owner of the property wants to wreck your life and sue you to set an example.
Keep all of these things in mind. Have a plan, do your research and work quickly. The less gear you take with you, the better. Best of luck if you choose to follow this path, worthy adventurer.
Posted on
March 21, 2018 by
Admin under
Business, Motivation, Photography
 2 full days spent at the NEC for this year’s Photography Show, and thoroughly enjoyed it all…! I attended the Pro Conference for the first time (two mornings) and was treated to some great talks from inspirational photographers and even an accountant, and the Sunday Times Magazine picture editor… They all combined to describe how to make yourself a better presented, organized, managed and tax-reducing photographer… all good news to the ears! Sometimes you can get waylaid down on things like accounts and make the job at least pay for itself and it was good to see people who are successful at this craft. And they are happy to share their wisdom and experience with us too. Thank you to them! See some of the links at the bottom for the speakers/companies involved, especially if you, reading this, are photographers!
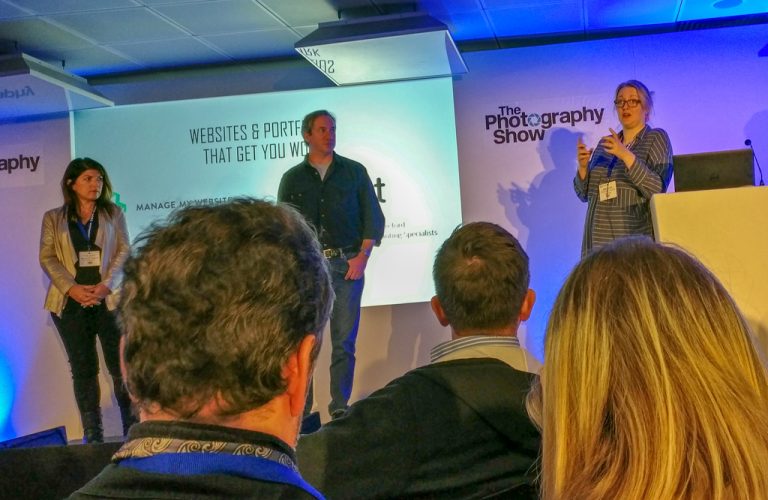 Some highlights… Day 1 – Emma Taylor kicked it off with a rousing talk about taking control and trying to define your style. This was followed by a talk on presenting yourself on websites and portfolios… has made me think again on my quite busy website, and will adopt some tips given on the day by Allie Astell (websites) and Marc Schlossman (printed portfolios). Then a very lively talk and quite inspiring one for me by portrait photographer Mark Wilkinson talking about the end to end process and the problems of setting the ‘right’ price for what photographers do… Didn’t have the answer (as no-one does) but gave some pointers to help! Then a useful end of the morning by accountant Eric Longley who told us a few tips on how to keep the money we do make!
 Day 2 started with Amy Shore discussing how to get to the front of the very busy field photography is. She is a car and lifestyle photographer and developed quite a niche for herself, but getting there was a journey of disappointment and ultimately delight! Then Tom Barnes gave a very enthusiastic and at times lightning speed talk through the subject of remaining creative and inspired and was an inspiration as he understood the lows and the highs of this art. He is a very successful commercial photographer. Then we were lucky enough to have an interview style Q&A with the Sunday Times Magazine picture editor, explaining what he wanted to see from photographers and how they should present their work to him. Very interesting, especially with the range of images the magazine covers, they are looking for photojournalistic / documentary photos that tell a story. And the second morning finished with award-winning photographer Emma Blau describing how important personal projects are in getting a photographer more exposure and other work through them. Again a great inspiring talk.
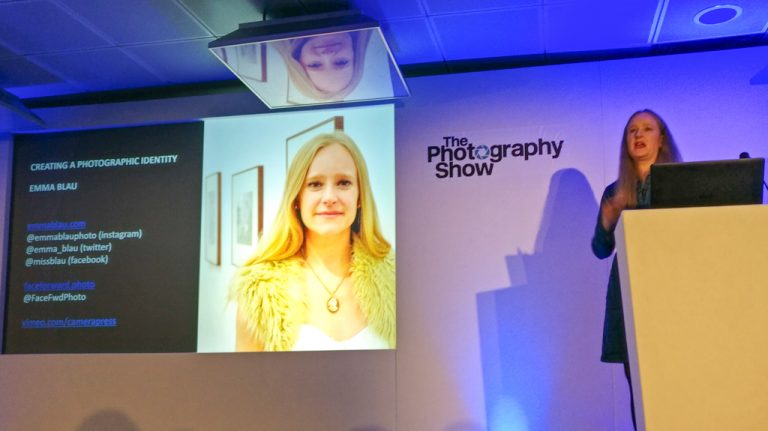
As well as this there was the show itself that ran for 4 days 17-20 March, a huge trade show with hundreds of stands with all sorts of stuff from the expected camera stalls to the more bizarre cat’s protection league, from photo holidays to photo printers (some absolutely huge!), lots of peripheral / add-on items, a plethora of photo and album stalls, and a lot of talks available on the many big stands and ‘stages’ around. I dipped in and out of a few but I was pretty well talked out by the two full morning sessions. One demo I did catch was at the Rotolight stand where Jason Lanier was demonstrating the latest LED Rotolights and was particularly interested in the smaller Neo 2 light which can be a continuous light, a flash, and High-Speed Sync Flash too… Very nice, in fact, I bought one! I had a good wander, talked to quite a few people, met a few faces from back home and a few more contacts made too. All in all a good couple of days. I wasn’t intending to spend a lot but did succumb a bit (but then, when in Rome!). I would recommend this show, anyone interested in photography will find something to look at, buy, or be inspired by. There were also many hundreds of photos hung around the arena, some great images to look at too!
 A couple of notes:-
1) All pics were taken on a camera phone, so apologies for the poor quality of some (it was just a note-taking device really!).
2) If you want any more detail or ask about any of the people/talks just comment below or message me on david@dwmphotography.com
Some Useful links:-
The Photography Show – https://www.photographyshow.com/
Some of the speakers (their sites have some great images!):-
Paul Wilkinson @paulwilkinsonphotography (Instagram) https://www.paulwilkinsonphotography.co.uk/
Amy Shore https://amyshorephotography.com/category/automotive/
Emma Blau http://www.emmablau.com/
Tom Barnes https://tombarnes.co/
Thanks, David!
Posted on
July 18, 2015 by
Admin under
Photo Sessions, Photography

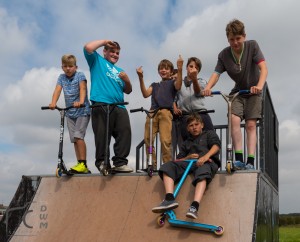
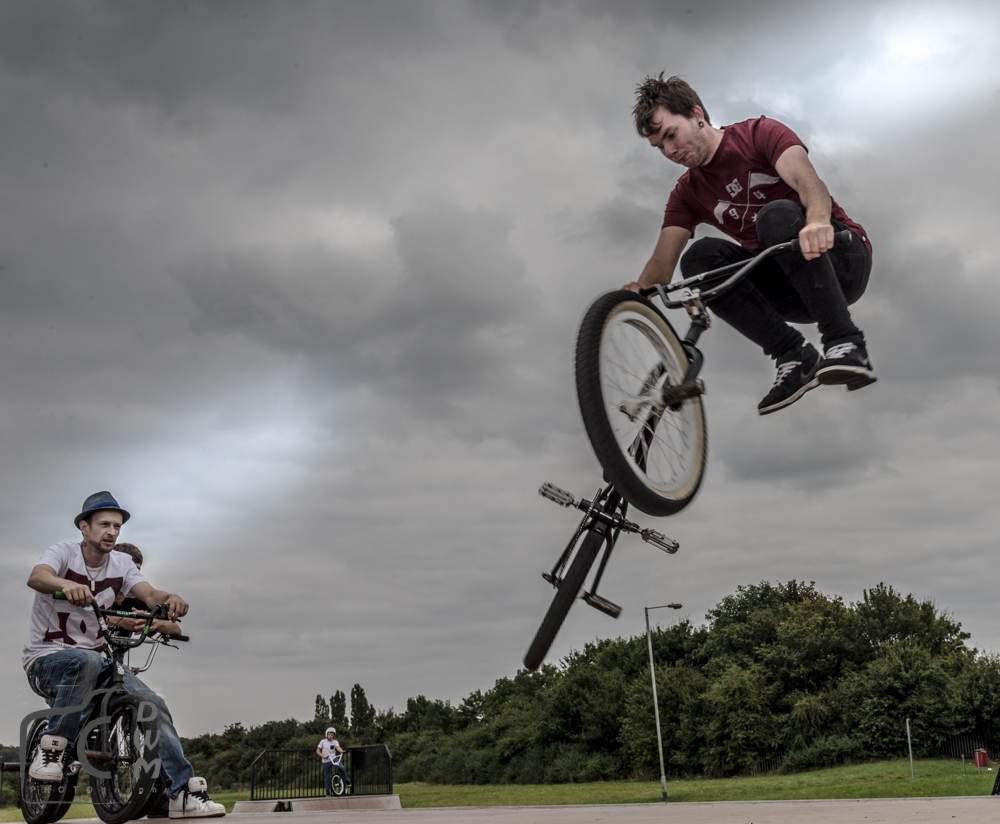
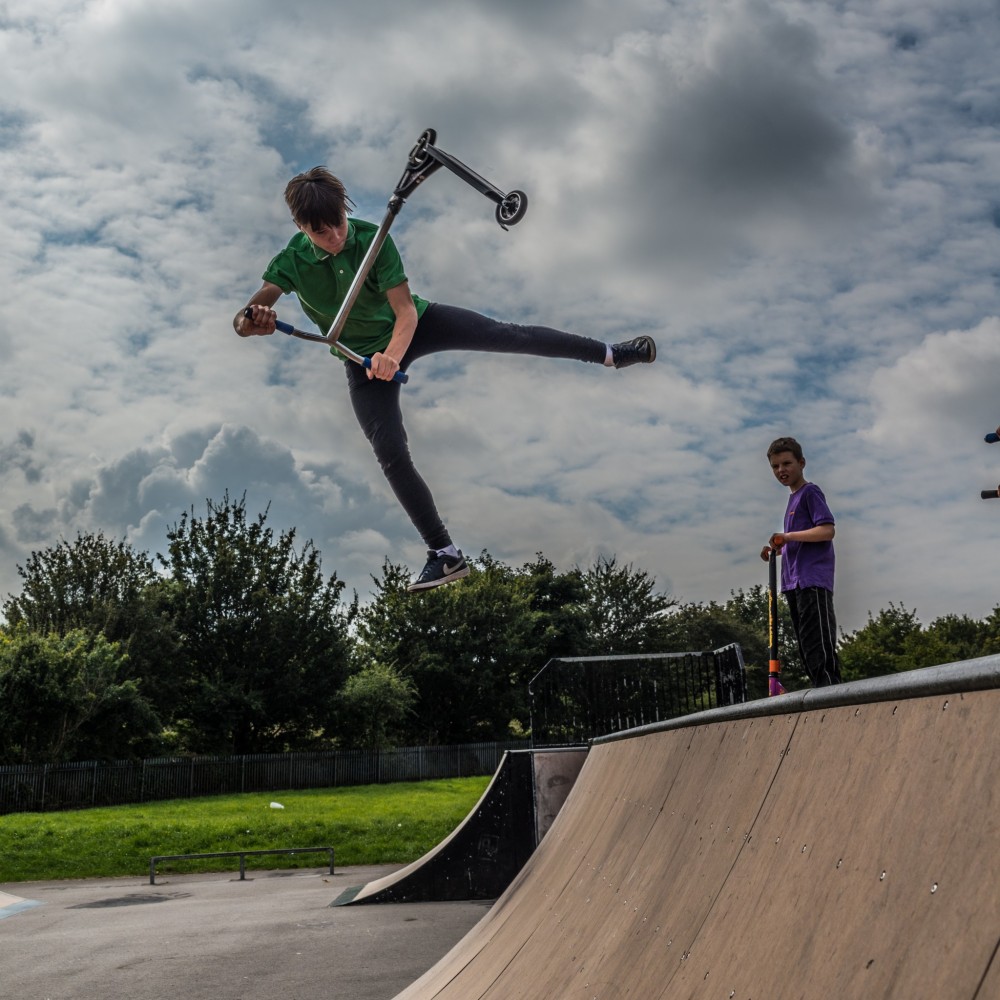
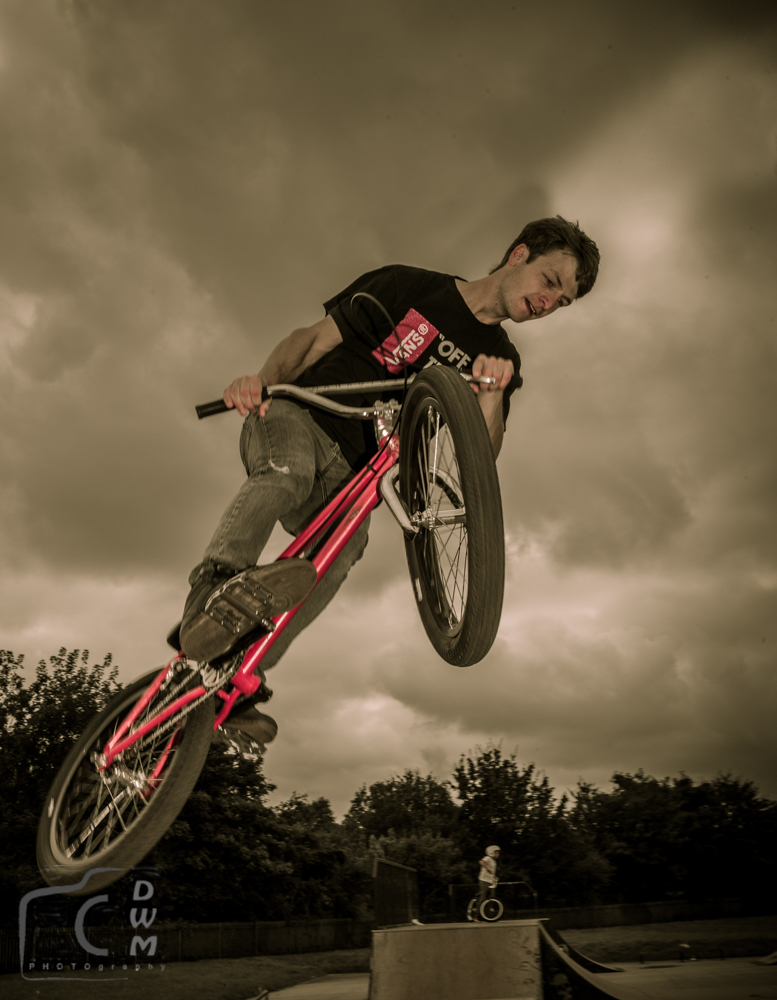
Although there has been a lot of resistance within the action sports community to the new boy on the scene there is no question now that freestyle scootering is here to stay for the foreseeable future. This trend has been seen played out before a number of times within the community. This is why I foresee a future where those core scooter riders who stick with the sport no matter what will be a part of the community judging the legitimacy of the next new sport to come up. Like all booming sports they are judged upon what most people see which is small children snaking everyone blindly at their local park. Not many people outside of the sport are privy to how rapidly the sport has progressed and just how insane some of the stuff being accomplished is. As the brand photographer for Grit, Crisp and Lucky scooters as well as one of the go to guys for the vast majority of events within the UK I’ve seen some crazy things done on scooters and also had the pleasure of capturing them. I’ve learnt a lot over my years in the role and hope these top ten tips for shooting freestyle scooting can help you achieve great results when out attempting to take photos of this sport
– What’s in ya Bag?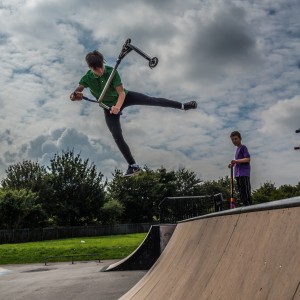
First things first and before you have even got to your shoot, what equipment are you taking? If the answer is all of your gear then think again! Shooting freestyle scootering is a lot like other extreme sports in that it is location based meaning you can spend a lot of time on your feet moving from one place to another. Only take what you need and make sure that bag you have is a reputable brand of bag so that it is both comfortable and supportive.
– Dress Sense
Bring location based means you can be out shooting in the elements or even a cold damp skatepark. These places are made for people who are exerting themselves for hours on end so don’t expect there to be central heating. Make sure you wrap up enough for the location and if possible bring an extra layer. You’ll be thanking yourself when you’re not so cold that you’re struggling to fire the shutter.
 – Talk Talk talk
Communication is key when shooting any action sport and talking to your subject can help you and your subject in a number of ways. Having them talk you through the trick and how they personally tweak it can help you get the best possible angle while telling them your plans saves you from placing light stands or other gear right in their way.
– Clean up
Although you should be pretty hot on keeping your equipment clean it never hurts to have a Lens pen or lens cloth in your pocket at all times. Skateparks and street locations can be pretty grotty places where lots of dust can get kicked up into the air. One quick wipe before you start prepping the shot ensures that every pixel shall have it chance to shine as it should in your final image.
– Pre Focus
Once you have an idea of how and where you want to shoot the trick from prefocus your shot. This is the key to getting the shot as quickly as possible without having your subject to perform the stunt over and over again. Getting them to stand where they shall be doing the trick and firing a few test shots is a sure way to check you’re all focused in on the right area.
– Duck!
Freestyle scootering alike any other extreme sport it quite a dangerous activity and those that decide to do it are fully aware of the risks, but that’s not where it ends. As you are now documenting it you became apart of that risk and with the highly technical nature of the sport its well worthy being aware of both your surroundings and what your subject is doing. Nobody wants to take a scooter deck to the face.
– Flash
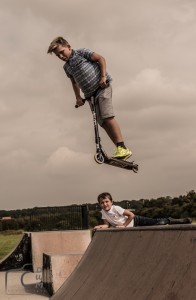
I can’t say enough about off camera flashes, if you are not already using them then change that right now. There are always great chances in which off camera flashes are not needed but the majority of the time I would say they are. Not only do they freeze the action well they also if used well can add more depth to your images making the action seem more explosive. They also open up the opportunity to shooting in low or even no light situations.
 – Too close for comfort
Something that is almost a necessity within action sports is with a wide angle or fisheye lens. These lenses allow you to get so much closer to the action which can provide some very striking results. They communicate the extreme nature of the sport really well. If not already in your kit bag then it’s one for the Christmas list.
– Go long
Don’t be afraid to get the long lens out and go for something more scenic. If the scene is worthy of capturing and the trick dynamic enough it will work. A good variation is always needed so don’t hide behind that Fisheye for fear of the trick not looking “extreme” enough.
– Experiment
Last but no means least remember this is only a set of tips to help you achieve the basics of shooting freestyle scooting. They are not a list of rules that are never to be broken. Switch things up; try something that is unconventional from the normal practice because you might just discover a new and amazing way of documenting the sport.
Posted on
July 16, 2015 by
Admin under
Photo Sessions, Photography, Sport
Here’s a fun list of what not to do on a photo shoot, this in no way includes everything you shouldn’t do. Please comment below with more things that you shouldn’t do on a shoot, and we will add those with a name credit and a link to your website.
- Forget vital gear (Camera, Lenses)
- Forget secondary gear (Flashes, Batteries, etc.)
- Stand in a dangerous place
- Step too close to a propeller or athlete with a fisheye lens….
- Talk about how everyone is a pro photographer now since the iPhone camera is soo good… Ugh
- Blame a bad photo on your gear.
- Steal another photographer’s angle without thanking them in advance.
- Leave your pack unattended in a crowd.
- Leave the lens cap on as you go to take your first shot.
- Act superior to other photographers at an event.
- Use words that make your athletes feel uncomfortable…
- Act too artsy and walk around framing the shot with your hands
- Ignore what your athletes ask you to shoot.
- Forget to change your ISO when the last shoot was at a ridiculously high number.
- Only shoot with your telephoto or fisheye and claim that they are all you need.
- Miss the shot because you got distracted
- Miss the shot for any reason other than equipment failure
- Show up with a Leica and explain how much better the images are than modern DSLRS
- Let your athletes order you around.
- Place your flash too close to the action thus allowing it to be damaged or ruined.
- Center the athlete in every photo.
- Guy in the sky (You know why!)
- Offer a lady “2 Tickets to the gun show” and pull out your two biggest camera lenses. (It could work, but the odds are heavily against you…)
- Steal another photographer’s flashes by “poaching” his radio channel with your radio.
- Stick to the rules of photographer like rule of thirds, breaking rules is fun, makes you appear cooler than you are, and will also achieve great images that aren’t the same thing everyone else is shooting
- Keep the “What not to do on a photo shoot” article a secret from photographer’s who are breaking rules, they need to know too!
- Your rule here (plus a link to your website) Submit via comments.
Posted on
July 9, 2015 by
Admin under
Photography
- Shoot every day Like any skill, the more you do it, the better you can get. The best camera you have is the one in your hand, so if you aren’t out with your full DSLR kit, don’t be afraid to take great photos with your cell phone camera or a point-and-shoot. Photography is photography, make pictures with a camera. Any camera.
- Always have your camera near Pull up a chair and I can describe two amazing scenes that have been indelibly embedded in my mind. Unfortunately, for the first, my camera was broken (I was at sea, far from a camera store). For the second, it was out of reach (I was flying). I have considered learning to draw or paint so I can make a “picture” of these two moments. The moral of these stories: have a camera within reach. You never know what will happen or what you will see.
- Read your manual Camera manuals aren’t engaging reading, but they do tell you a lot about how to use your camera. Spend a night or two with your manual and get intimate with your camera. This will help you every time you photograph. Most manuals are now available electronically, so know where to find it, or save it on your mobile device for reference in the field.
- Check your settings / know your gear I have often been tempted to put the following note on a sticker and affix it to my LCD screen: “Check your ISO, dummy.” If I had a nickel for each time I went out in the sunlight with my ISO at 800 or higher after shooting the previous evening in a dark restaurant, I would own a newer camera. Know what your settings are and how to change them quickly.
- Change perspective / angle We see the world from eye level, and most people’s eyes are, generally, at roughly the same height. Should your photographs constantly record the world from the same altitude as your eyes? You will be amazed at how shooting from your knees, or a high ground, will change your image. Watch a documentary film about a documentary photographer and see how they move and silently wonder how many pairs of pants they wear out by constantly kneeling to shoot from low angles.
- Know your meter Know your camera’s metering modes and use them to your advantage. When you frame an image, see the light and then meter for how you want your scene to be exposed. Is the lighting flat? Is a ray of light illuminating your subject? Do you want the background to melt into darkness? Your camera will help you achieve your goal; you just have to tell it how to do it. Practice metering and setting exposure.
- Know your shooting/exposure modes Similar to the last tip, your camera is smart, but it needs help from you from time to time. Some will tell you to always shoot manual. I disagree. Know how to shoot manual, but also know when other shooting/exposure modes will be advantageous for your particular photographic goal(s).
- Know your focus modes If you use autofocus, and you likely do, the camera’s autofocus is either going to make the picture or ruin it. Know what the autofocus modes do and how to adjust focus if the camera suddenly decides it thinks it knows better than you what part of the frame you want in focus.

- Study photos—but not too much Study the photographs of others. What do you like? What do you dislike? What would you improve? Is it perfect? Why, then, is it perfect? Look. Enjoy. Remember. Soak it in. But, don’t forget to go out and make your own images!
- Read photo books Books and websites have helpful tips (I hope this counts). But, not all are created equal. Find writers who you connect with through their writing and find writers who give good advice. I am a big fan of “basic photography” books and, to this day, even with a Masters degree in the topic, I populate my bookshelf with inspirational books written for beginner photographers.
- Learn/Workshops The only substitute for learning through reading (or watching videos) is to make images yourself. Take a class. Attend a workshop. Similar to books and websites, these are not all created equal, but, the one thing they should do is immerse you in photography for a night or a weekend, or more. Being immersed in the art and craft is as important as anything else.
- Use your histogram In digital photography, the histogram is the best way to evaluate your exposure for accuracy. The LCD screen can be misleading. Knowing how to read your histogram might be the difference between thinking you have a great photo and truly having a great photo.

- Shoot RAW, highest-resolution JPEG, or film Shooting RAW gives you the best performance from your sensor. That is a fact. However, RAW shooting isn’t practical for every photographer (or camera). So, if you aren’t going to shoot RAW, shoot the highest-resolution JPEG that your camera allows. This way, even if you think you are just taking snapshots, you will have the ability to make a large print if you find that you captured an image you really like. Or, forget the digital RAW vs. JPEG debate and shoot film. Case closed!
- Compose meticulously There is a nature/nurture argument about composition. However, study the “rules” and observe composition in other images to help you “feel” what works best. Then, try to use that knowledge to your advantage. Be deliberate about your composition, if time allows.
- Symmetry Along the same lines, if you are going for symmetry, make sure you nail it. A few inches in one direction can upset the image’s symmetry, and your audience (and you) will know you were going for symmetry and missed. Photography can be a game of inches.
- Pay attention to the frame edges The image is more than the subject (usually). Scrutinize the corners and the sides and top and bottom of your frame. Is everything working together well, or is something completely out of place? Can you adjust to remove the “noise” of a busy scene? Look at the whole so the whole does not detract from your subject.

- Pay attention to the background Evaluate your scene, especially in portraiture. Is that a tree growing out of the subject’s head, or just a funky new hat? Isolate your subjects from the background by adjusting depth of field, moving the camera, or moving the subject—unless the subject is the background.
- Get closer Robert Capa famously said, “If your pictures aren’t good enough, you aren’t close enough.” He was 100% right. Fill your frame with the subject, if you can. This is one of the most difficult things to do in photography, as we sometimes worry about being invasive to a stranger, or lazily reach for a telephoto lens to “cheat” and pretend we got close. Get closer and see your imagery improve.
- Slow down Of course, there are times when you need a quick draw, but there is something to be said for planning and being deliberate. Think about the shot. Visualize the results and calculate what you need to do to try to achieve it. Put your plan into action. Wait for elements to come together, if needed, and then make a photograph.
- Use a tripod Nothing slows you down like a tripod. This is a good thing. Did you just breeze over #19? The tripod won’t let you do that. Also, as an added bonus, the tripod will hold your camera steady and help you get a sharper image!
- Practice good technique The way you hold your camera can make a big difference. The way you stand while shooting can make a big difference. The way you breathe when you release the shutter can make a big difference. It all adds up and can make or break your photograph. Learn and practice these fundamentals.
- Look for light Light is everything in photography. Spend your time looking for light, even if you aren’t taking photos. Look for sun beams and breaks, reflections, shadows, natural light, artificial light. See how light interacts with the environment. See light.
- Embrace shade The wonderful side effect of light is shadow. Shadow is as valuable as light and gives depth and shape to objects. Use shadow in your images. Don’t run from shadow. Embrace it.
- Patience Is the light not right? Is the subject in the wrong spot? Sometimes the wrongs of a photo can become rights, if you have time to let the rights happen. Modern life is much faster than it was long ago. Use photography to slow it down and enjoy moments in time. Then, capture them with your camera.
- Know the rules, and break them Cliché, but true. An intentionally over- or underexposed image is usually much more compelling than one that was incorrectly exposed accidently. The only good blur is intentional blur. Photography is aesthetic and you can explore the fringes of what looks good and what doesn’t. But, have a reason to be at the fringe, because the “my camera settings were messed up” excuse is not a good reason for promoting soft focus or motion blur. The photo may be compelling, but intentionally compelling is the better way to go.
- Know your lenses Different lenses do different things to an image. Know how your telephotos compress and your wide-angles distort. Use the best lens for your photographic vision. Fisheye portraits are fun, but not great for professional headshots. Sometimes you only have your one lens. Know its strengths and weaknesses. For all your lenses, know which apertures are sharpest and know when you lose sharpness.
- Don’t overload your quiver A heavy camera bag is no fun, unless someone else is carrying it for you. Pack only what you need and hope you didn’t leave something important behind. Photography can become a chore when you are overloaded with gear. Minimize and travel light. Your shoulders and back will thank you. So will your spirit.
- Know your surroundings When you look through a viewfinder, you narrow your field of view of the world around you. Situational awareness is critical. Are you standing in the middle of a busy street? Are you blocking others from a great view? Are you in a bad section of town? Be aware of what is happening around you both for safety and courtesy and to see and capture more images.

- Know the weather Keep a weather eye on the horizon. Weather can plan an important role in your image: wind, clouds, sun, rain, snow, lightning, etc. Weather can help make an image, or ruin your whole day. Use the weather to make better photos. Wear sunscreen. Wear a hat. Stay warm. Stay cool. Stay dry. Be prepared and be safe.
- Celestial awareness Long the purview of the night photographer, knowing when and where celestial bodies will rise and set can be critical to your imagery. Planning helps make better images at all times. Of course, you might just have to play the cards you are dealt, but, if you give a nod to studying the rotation of the Earth, you might stack the deck in your favor.
- Analyze your old images Be your harshest critic. Internalize it. Study your images and learn from your own mistakes. Or, if you find your images are perfect, quit before they are not!
- Try a prime lens Zoom lenses are convenient and optically very good, but there is not yet a substitute for a top-quality prime lens. A zoom can mask laziness in photography. The prime forces you to not only think, but to move, as well. This will open up more opportunities than it will close.

- Photo project / concept There is certainly a place for random snapshots in the world of photography but, a coherent photo project, especially when it is generated from an internal concept driven by passion can self-inspire you to create a solid body of work. Do you want to tell a story? Do you want to document social or physical change? Use your camera to illustrate your thoughts.
- Abstracts See the small parts of a scene. Look for the trees in the forest. The light or shadow may be creating an image inside your image. Find it. Capture it. Some photographers know nothing but the abstract. Some know no abstractions. Find your own balance. Explore the scene and create.
- Photographing pretty things Flowers, sunsets, mountains, and babies are already pretty. Your camera simply proves that point. There is nothing wrong with photographing pretty things—I do it all the time—but sometimes you can surprise yourself by using your camera to make something unattractive suddenly attractive, or, at least, visually interesting. The camera and photographer can combine to possess the power to capture what the eye might disregard.
- Editing It is likely that not every shot you took was great, so look hard, be critical, and discard images that do not make the cut. Granted, photography is subjective, and someone might love a shot that you do not love, but, you are the most important viewer of your work, so only show what you love.
- Critique Open yourself to critique after you have critiqued yourself. Put on your armor, but know that, again, photography is subjective, so listen respectfully to opinions and be open-minded so that you may learn and grow—especially if you agree with them. But remember, always, if you love an image that you have made, no one should be able to take that away from you. If you hang it on your wall or display it on your computer screen and enjoy looking at it, you have made a successful image.
- Develop a style If your photos look like everyone else’s, there is nothing wrong with that. However, if you want your personality to shine through your images, then experiment and find a style that suits your artistic vision. Be consistent with your style, but also realize that your style might not fit every shooting situation. Don’t force it. Always know the fundamentals so you can fall back on them when needed.
- Search yourself for improvement, not your gear A great photographer can make a great photograph with any camera. A poor photographer can make a poor photograph with the world’s most expensive camera. Photography is a technologically based art form, but the technology does not make the art, the human behind the camera does. Do not look for solutions in something that runs on batteries and arrives in a box.
- Study art Other forms of art can teach and inspire the photographer, especially painting. I prefer photographic art exhibits, but, when I am in the presence of paintings, I study them to see how the artist used color, light, shadow, line, composition, etc, to make the image successful—or not.

- Don’t lose the moment Those two moments I mentioned above, when I did not have a camera to capture them, I remember vividly because I was present and I was not looking through a viewfinder. I have thousands of images from a 10-day trip to Eastern Europe, but today I struggle to tell friends what city I was standing in when I took a particular photo. You can get lost in your camera’s viewfinder and the process of making photos. Remember to live first, experience the moment, be present, and only then try to capture it.
- Look for images Even if you are without a camera (Why didn’t you take #2 to heart?), look for photographs. Not every camera can capture every virtual photograph, but your eye and mind certainly can. Constantly see the world around you and look for photographs, even if they are impossible to capture with the gear you have in your bag or front pocket. Look for photographs. Look for photographs.
- Experiment Push yourself. Push your gear. Experiment with different settings, scenes, lights, darks, colors, everything. You will never know what you can capture until you capture it. The magic of digital photography is that each image is virtually free, so the only thing you may waste is a fraction of a second. Free your mind. Be creative with your camera.
- Have fun If you aren’t enjoying photography, #1 through #43 are not going to help. Smile behind the lens. Create art. Capture moments. Share images. Get outside. Explore inside. But, regardless of your results, have fun with photography. Nothing else really matters—not even the photograph.
Posted on
July 8, 2015 by
Admin under
Photography
 Photography allows one to capture the world around them with the press of a shutter. From a scientific perspective, it is the act of recording light either electronically or chemically. However, this tells us nothing about the heart of photography and what it truly means to us on a personal level. I have assembled a list of 20 great quotes from notable photographers, past and present that answers the simple question: “What is photography?”
“Photography is a way of feeling, of touching, of loving. What you have caught on film is captured forever… it remembers little things, long after you have forgotten everything.”
—Aaron Siskind
“Photography is an art of observation. It’s about finding something interesting in an ordinary place… I’ve found it has little to do with the things you see and everything to do with the way you see them.”
—Elliott Erwitt
“Photography to me is catching a moment which is passing, and which is true.”
—Jacques-Henri Lartigue
“A photograph is a secret about a secret. The more it tells you the less you know.”
—Diane Arbus
“Photography is a kind of virtual reality, and it helps if you can create the illusion of being in an interesting world.”
—Steven Pinker
“Photography takes an instant out of time, altering life by holding it still.”
—Dorothea Lange
“Photography is a way to shape human perception.”
—James Balog
“Photography is the simplest thing in the world, but it is incredibly complicated to make it really work.”
—Martin Parr
“Photography is like a moment, an instant. You need a half-second to get the photo. So it’s good to capture people when they are themselves.”
—Patrick Demarchelier
“Photography is an immediate reaction, drawing is a meditation.”
—Henri Cartier-Bresson
“Photography is the simultaneous recognition, in a fraction of a second, of the significance of an event.”
—Henri Cartier-Bresson
“Photography is more than a medium for factual communication of ideas. It is a creative art.”
—Ansel Adams
“Photography is about finding out what can happen in the frame. When you put four edges around some facts, you change those facts.”
—Garry Winogrand
“Photography is truth. The cinema is truth twenty-four times per second.”
—Jean-Luc Godard
“Photography is pretty simple stuff. You just react to what you see, and take many, many pictures.”
—Elliott Erwitt
“Photography is a small voice, at best, but sometimes one photograph, or a group of them, can lure our sense of awareness.”
—W. Eugene Smith
“Photography is a reality so subtle that it becomes more real than reality.”
—Alfred Stieglitz
“Photography is a way of putting distance between myself and the work which sometimes helps me to see more clearly what it is that I have made.”
—Andy Goldsworthy
“Photography is a major force in explaining man to man.”
—Edward Steichen
“Photography is the easiest medium with which to be merely competent. Almost anybody can be competent. It’s the hardest medium in which to have some sort of personal vision and to have a signature style.”
—Chuck Close
What’s photography to you? Share your personal quote with us in the comments below!
Posted on
June 16, 2015 by
Admin under
Photo Sessions, Photography
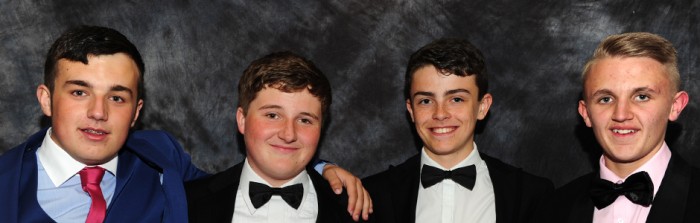
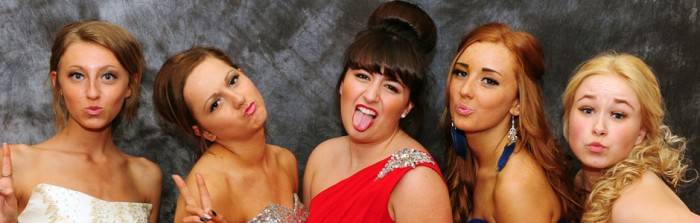
 The High School Prom is a highlight of any teens time at High School, and what better way of capturing the moment than getting together with a few close friends and having a pre-prom photo party?
For a maximum of 8 students I would capture their excitement prior to them leaving for the prom. Dependent on the weather I would take a variety of shots both individual and group shots, either inside in a studio environment that I can bring to an address of your choice, within the Gainsborough/Retford/Bawtry catchment area, (if you are outside this area please call and for a small fee to cover travel I would be happy to come to most locations), or hopefully it will be sunny outside and we can get some exciting shots in the sunshine.
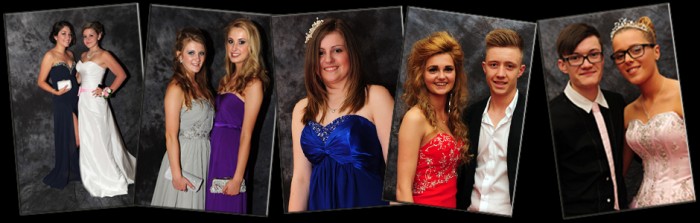
I like to capture something a bit different to the traditional prom portraits, and provide students with shots that are cool enough to share with their mates on Facebook, but will also stand the test of time.
Please see below the packages available
Package 1 (Minimum of 4)
I would arrive 2 hours prior to the time the students are due to leave for their prom. I would capture both group and individual shots of each student. The best edited shots would be posted on an individual password protected website, from which you could choose one individual and one group shot to be printed and mounted at 8 x 10 inch.
£30.00 each
Package 2 (Minimum of 4)
I would arrive 2 hours prior to the time the students are due to leave for their prom. I would capture both group and individual shots of each student. The best edited shots would be posted on an individual password protected website, from which you could choose one individual and one group shot to be printed and mounted at 8 x 10 inch. I would also supply 10 of your images in low resolution on a disc, which would be suitable for posting on social networks.
£40.00 each
Package 3 (Minimum of 4)
I would arrive 2 hours prior to the time the students are due to leave for their prom. I would capture both group and individual shots of each student. The best edited shots would be posted on an individual password protected website, from which you could choose one individual and one group shot to be printed and mounted at 8 x 10 inch. I would also supply all of your images in high resolution on a disc, which would be suitable for printing yourself, and I would also provide a DVD with edited images put to music, please see examples in the video gallery.
£65.00 each
Further discs and images can be purchased separately.

To book your prom photos or if you require any further information contact me


Recent Comments